Firmware Guide
1. Clone the firmware repo
Note
As development happens fast, we recommend using the experimental branch for the latest features.
Stable:
Experimental:You can also download and extract the stable or experimental repos manually instead.
2. Setting up the Build Tools
Warning
Make sure you are actually using Microsoft Visual Studio Code, there have been compatibility issues with other IDEs like codium, code, cursor, etc.
Open the firmware folder in Microsoft Visual Studio Code.
Open the extensions view (Ctrl+Shift+X), then search for and install the PlatformIO extension.
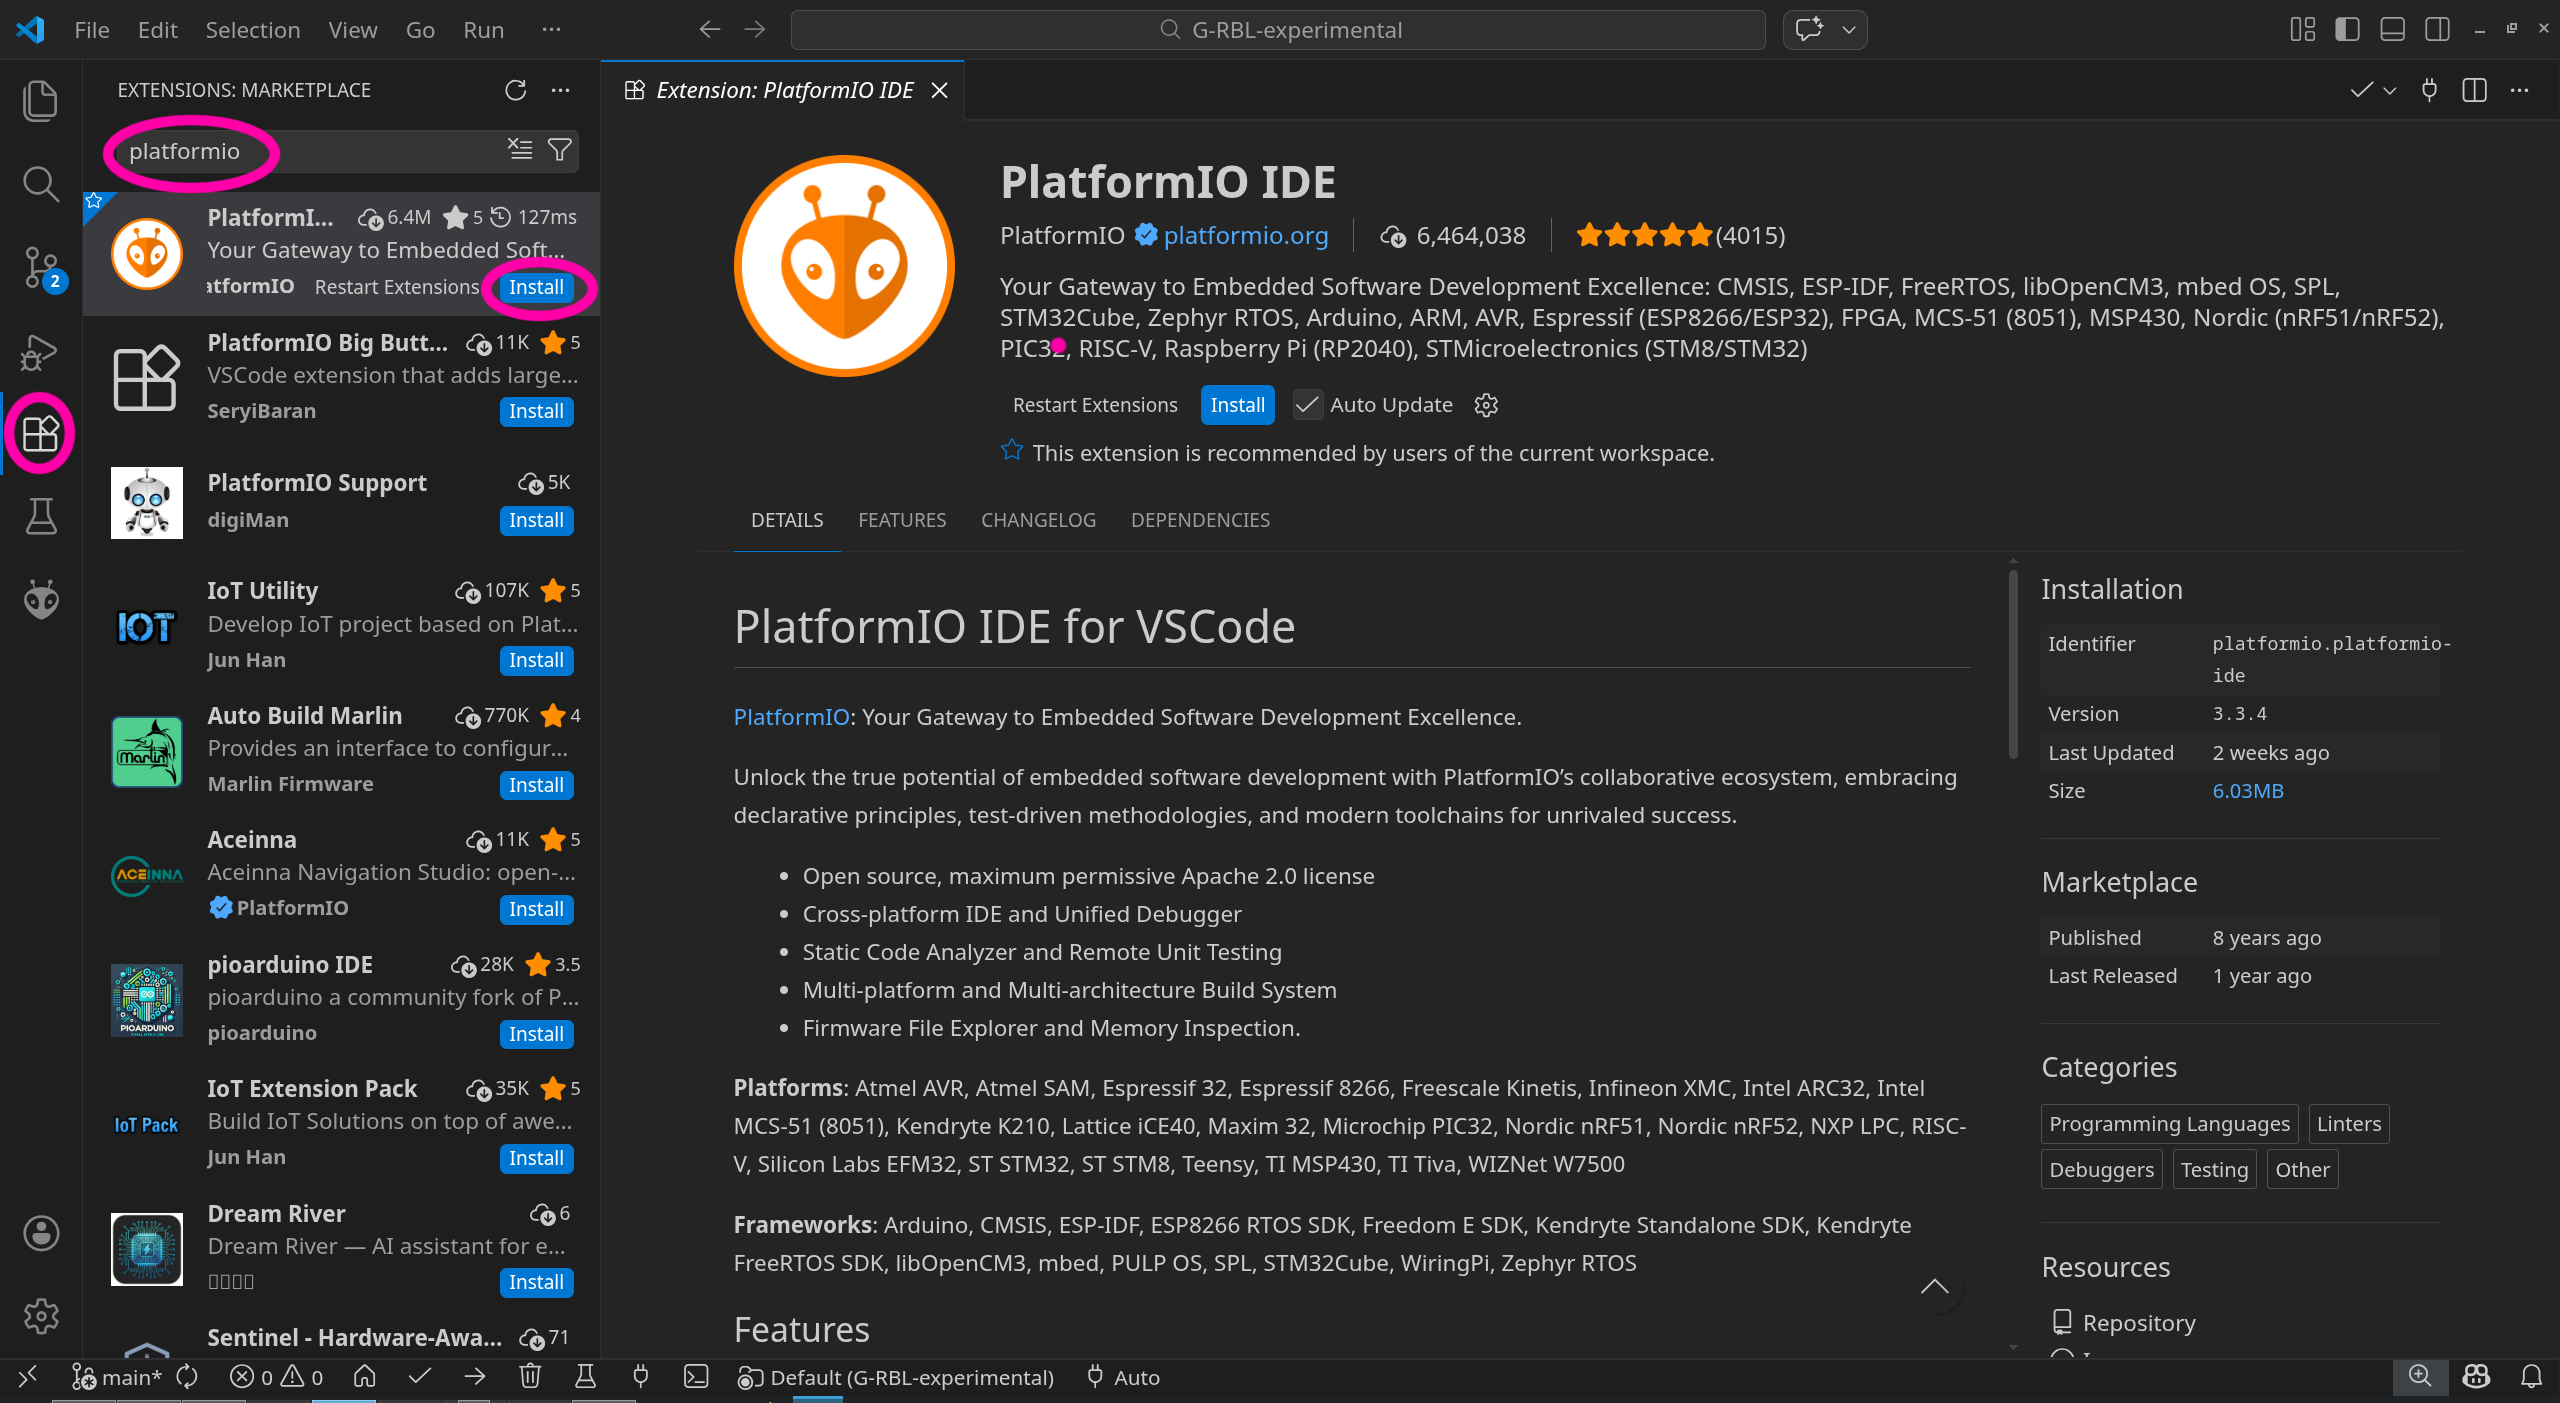
Note
PlatformIO may take several minutes after being installed to set up the build environment, this is a good time to get a coffee
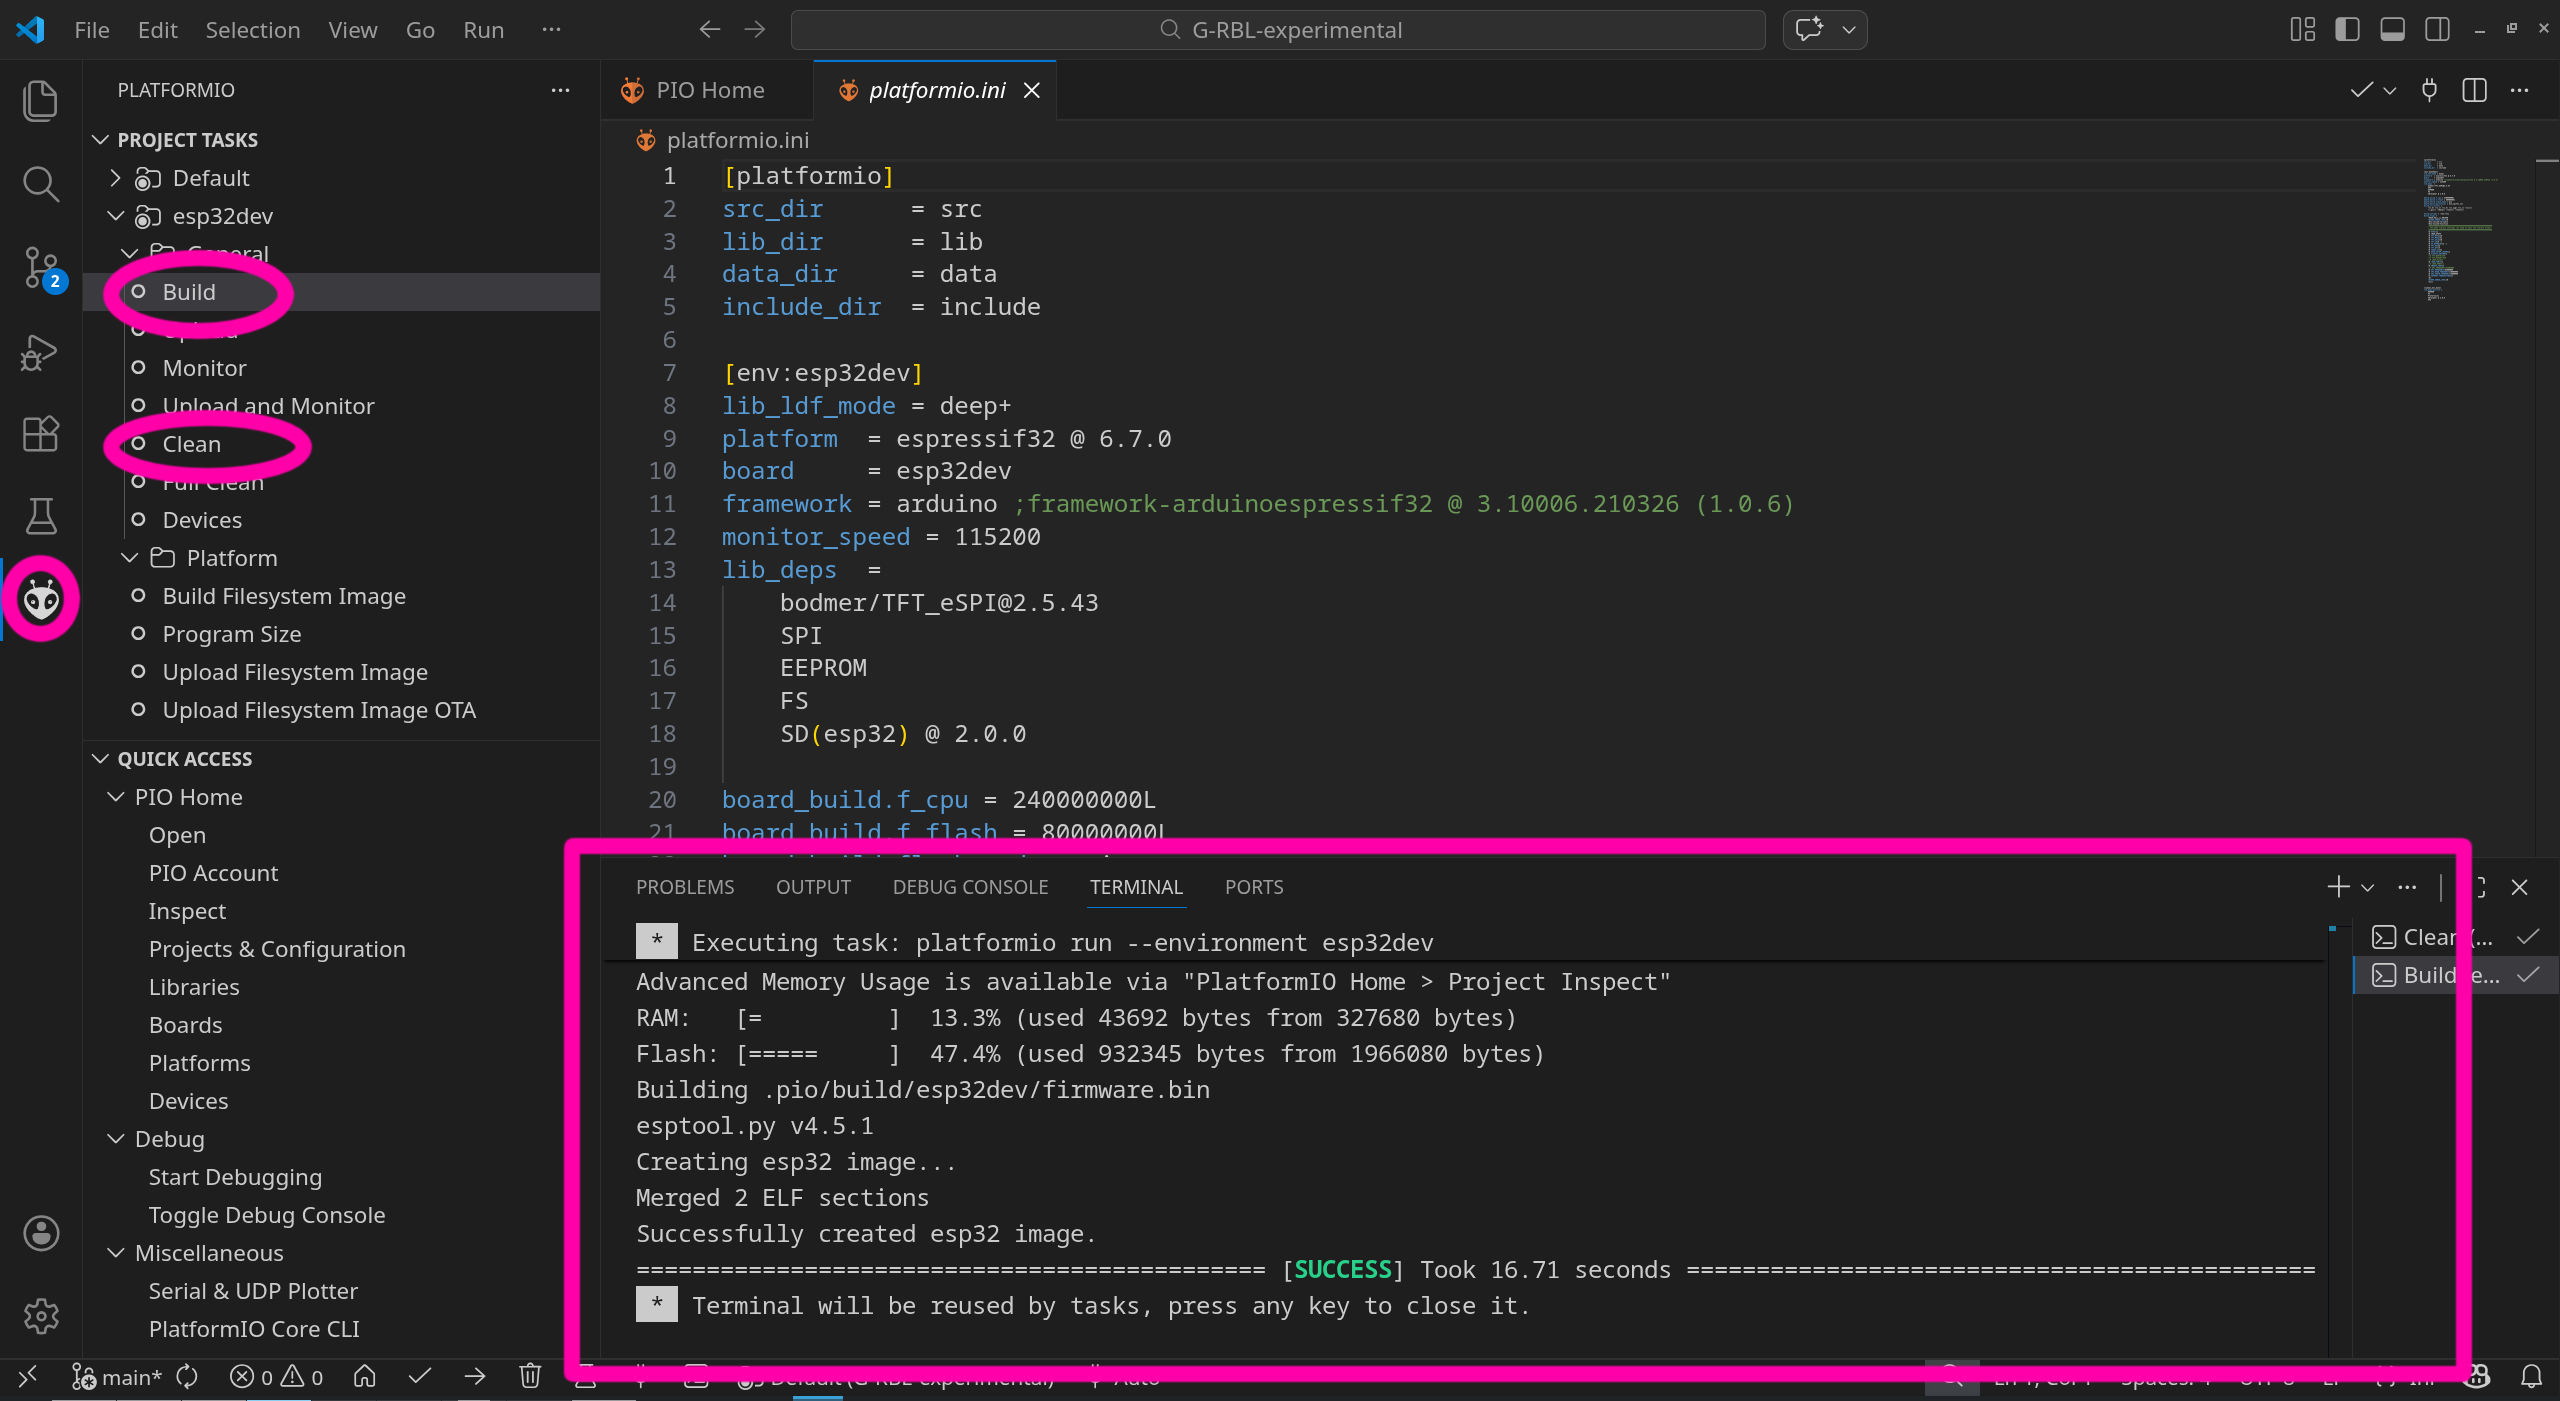
3. Building the Firmware
Open the PlatformIO view (Ctrl+Shift+P), then select clean to ensure the build folder is clean.
Then select build to build the firmware.
A terminal window will appear at the bottom, where you can see the build process.
4. Flashing the Firmware
If you have a functional firmware running on the motionboard already, it should be able to auto update via the SD card. Skip to 4.b.
4.a Flashing via USB
Remove the ESP32 Devboard from the motionboard, making sure not to bend the headers.
Connect the ESP32 Devboard to your computer via USB.
Open the PlatformIO view (Ctrl+Shift+P), then select upload to upload the firmware to the ESP32 Devboard.
Install the ESP32 Devboard board onto the motionboard, making sure the headers match up with the motionboard.

4.b Updating via SD Card
The compiled firmware.bin file should be located in the project folder at /.pio/build/esp32dev/firmware.bin.
Just copy the firmware.bin file into the top root directory of the SD card.